
Tips & Techniques from The Peddler
Crafts for Fun and Profit
Notes on Repairing Pottery and Dishes
© 2000 Stephen G. Kent - Homespun Peddler
We recently had an interesting e-mail question: "How do you repair porcelain or china". That's a bit out of our usual area of expertise, but not totally. As it turns out, it's something of an obsession of mine... I like to try to glue broken dishes back together! I just can't throw a broken piece away until I try to put it back together. (I do get a grip on my urges when it comes to broken eggs.)
So, given my obsession, I'll pass along some tips on how I repair china and pottery and other dishes. Please note, if you need to repair a valuable piece, you SHOULD NOT put too much faith in these tips. What I do is for fun, not for restoring antiques!
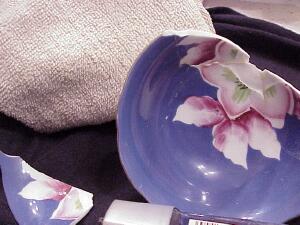
Here's a typical example of the things I like to repair. This piece actually was something of an antique and it was from Pattye's tea cup collection. Since I broke it, trying to repair it was important to maintain maritial harmony in the Peddler's household!
For projects like this, I typically use yellow (woodworkers) glue or white (Elmer's) glue. These glues are water soluble which allows easy clean up. They're also fairly quick setting and generally water resistant.
For stoneware and the typical glazed pottery type dinnerware, the yellow / white glue method actually works well enough to put most items back into service. I have an old "rebuilt" coffee mug that's been going through the "use / age in the sink / wash" cycle for years, and it's still holding.
I've tried to do "crystal" dishes a few times. For those I used one of those instant "super glue" products. It works fairly well; it's clear and it's fast. But it's also unforgiving... if you mess up, you don't get another chance. Besides that, glass is hard to work with. It's sharp, there are usually many small pieces that are hard to find, and there is seldom a pattern to match up.
The yellow/white glue method works well on any earthenware, stoneware or other pottery type of item. This includes "china" type tea cups and saucers such as the example shown here. (The glue likes porous materials.)
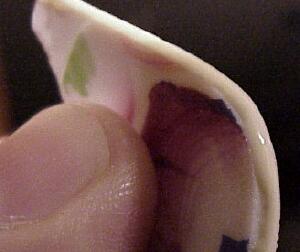
The repair shown at right was done with yellow glue. With care and a thin line of glue applied to a clean break, the finished joint is hardly visible!
If you want try your hand at this type of repair, here are a few tips.
So that's it. Even if it doesn't work perfectly, even if it fails entirely, it can be great fun to try to assemble this type of puzzle. If all comes out well, you may save your marriage too!
- Use fresh glue. If your glue bottle has been sitting on a shelf for a year, it may have thickened. That's fine for wood or paper, but not for pottery.
- Try to "dry assemble" pieces first. This lets you identify what goes where.
Gently put matching pieces together and wiggle them until you feel a firm fit. If the pieces do match you should be able to feel the fit because things stop sliding.
Slide a fingertip over the outside and inside of a joint. A perfect fit is perfectly smooth. A mis-fit is easy to feel.
- Be careful to not chip edges and sharp points during trial fit and assembly.
- Assemble larger pieces and let them dry then move on.
- Don't paint yourself into a corner by putting pieces together that leave a hole where you can't insert another missing piece. This is a real challenge sometimes!
- Use a very thin glue line applied to one side only. Press the pieces together lightly to spread the glue then press firmly and then HOLD them together with slight pressure for several minutes.
This is the uncomfortable part. But it also gives the best results. You want the glue to begin to set up before taking the pressure off.
Be careful to not get too much glue near the end of a joint where another piece will later be inserted. A tiny bit of dry glue at that point can prevent the next piece from fitting properly!
Don't worry about a bead of glue coming out of the middle of the joint. Trying to wipe it up may just smear it. Once the glue becomes rubbery you can usually roll it off with your finger. When it's completely dry, it will often just chip off when scrapped with a small knife or nail file. (be careful not to scratch the surface).
It IS possible to wipe the bead of glue off with a wet rag. This is the best cleanup method, but it's difficult to do while holding the pieces together. If you have a helper, get them to clean the excess. Be careful.
- Once the glue has started to set up, prop the piece up in a standing position so that the joint is fairly well balanced.
That's not as hard as it sounds. The objective is to avoid stress on the joint while the glue cures. By having the piece VERTICAL, all the weight is straight down on the joint. The glue will have set enough to hold the piece balanced.
Let it dry for several hours!
- Be asware that you usually get only one chance on each mend. If a joint fails, the dry glue on the edges prevents the two pieces from ever mating exactly again.
If a glue joint DOES fail, pray that it happens BEFORE the glue has completely set. If possible, clean every bit of glue from both sides of the joint with a wet rag.
Try to assemble the joint again before the last film of glue drys again. If the old glue is soft enough you may still get a tight fit.
Tips and Techniques front page
v210.0
For more information send e-mail to the Peddler.
 HOME PAGE